Showing posts with label "Phone Pouch". Show all posts
October 16, 2010
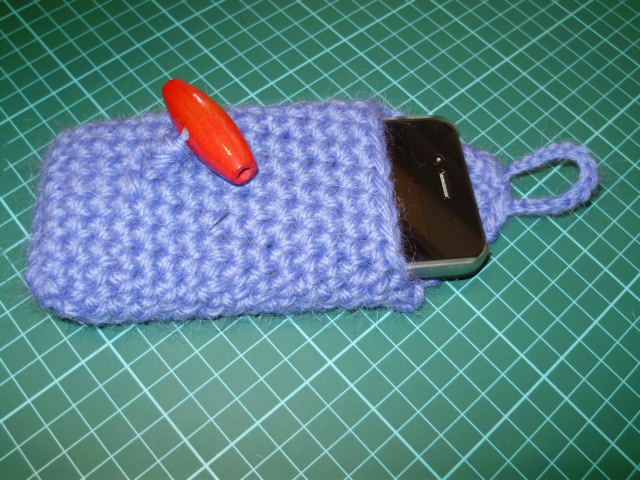
Crochet iphone pouch
This is my crochet iphone pouch. After the fabric pouch, a friend asked "have you thought about crocheting a pouch of your iphone as well?" I thought hmmm, sure, why not. So I grabbed the biggest yarn I have in my stash and started to chain up. I used a 12ply 100% wool yarn and a 6mm hook so it came up really quickly. In fact, I think it took me longer to put the button on than crocheting the pouch as hubby had to drill two holes in this big wooden bead, then it took him a few more minutes to thread through the yarn before I could stitch it on.
Anyway, here is how I made the pouch, in my words (so won't sound very professional):
1. Chain 11
2. Single crochet (sc) into the top loop of the 2nd chain from the hook, continue to the end, total 10 sc
3. sc in the back loop of 10 sc stitches, turn.
So there should be 20 sc in total. Put marker here to keep track of where the "round" starts.
4. sc around until 13cm (I did 15 rounds)
5. To make the flap, bind off the first 10 sc, 1 invisible decrease (inv dec), 6 sc, 1 inv dec (8 sc), turn
6. 8 sc across
7. 1 inv dec, 4 sc, 1 inv dec (6 sc), turn
8. 6 sc across
9. 1 inv dec, 2 sc, 1 inv dec (4 sc), turn
10. 4 sc across
11. Bind off, leave long tail (about 15cm) to make the loop
12. The size of the loop depends on how big the button is. For my loop, I just did 15 chains, work 14 sc in each chain, bind off. Use a yarn needle to weave the tail in the 3rd sc in the last row.
13. Now stitch on the button to the front of pouch.
Ta dah! this makes sense to me but I still have to test these steps so I am guessing I will making at least another one! There is nothing wrong with having different colours phone pouches right?
Until next time...
Labels:
"Phone Pouch"
,
Crochet
,
Pattern
,
Yarn
October 3, 2010
My "i-pouch"
It has been just over a week since I got the new iphone4. I have managed not to drop it but it copped a lot of scratches from all the sloshing around in my handbag. Fortunately I stuck a layer of screen protector in the front and back straight away. I knew it would be a matter of time before something "cracking" happens to it... So I have since got a case that is not so bulky, black hard plastic slim shape with the Apple label on the back - as normal a case as I could find them. It still leaves the face of the phone exposed.... hmmm, got to a make a pouch! I knew just the fabric for this... I have been wanting to use this mushrooms fabric since I got it many months ago - perfect!
I planned to just machine stitch the sides at the final stage but turned out it is too thick and I like my machine too much to step on the pedal harder so I just hand sewn the blanket stitches on, turned out ok I think.
The big clip came from an old ipac case I had from eons ago and I thought it would be perfect for hooking the pouch in place inside my handbag for easy access.
I can think of a few changes to improve this pattern but it is my first attempt at drawing it up, experimented with the measurements, fabrics, interfacing etc. I would definitely like to make a couple more in the coming months to do more testing.
Until next time...
Labels:
"Phone Pouch"
,
iPhone
,
Sewing
Subscribe to:
Posts
(
Atom
)